 Stop being confused about accessibility.
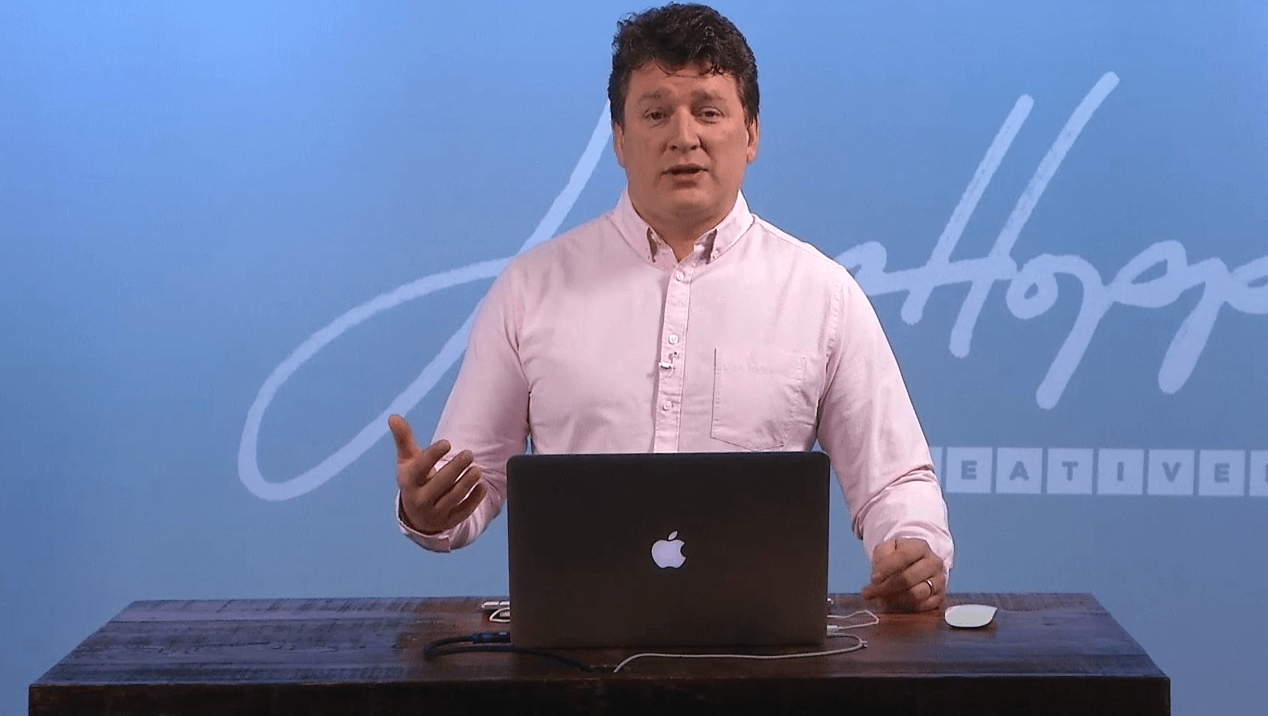
Do you need to work smarter in InDesign? Maybe you’re unknowingly wasting time when creating new documents or you’re guilty of “guide hoarding.” Find out and learn some best practices and time-saving tips as the hilarious Jason Hoppe and I talk about InDesign and page layout in this special hour-long episode. Plus, find out which InDesign feature Jason calls “delicious” and what some designers do that he says is “like walking and having your pants not go with you.”
Music: https://www.bensound.com
Show Notes
- CreativeLive courses (affiliate link; I will be compensated if you make a purchase after clicking the link. It will not cost you anything additional. Proceeds go toward expenses for the website and podcast.)
- Jason’s Illustrator blog
 An Adobe® Certified Expert and Adobe® Certified Instructor, Jason Hoppe has accrued more than 20 years’ experience in high-end production training, photo retouching, color correction and creative workflow management. In fact, Jason has been performing high-end electronic production since the industry’s inception. Also during this time, Jason has taught prepress and electronic design to hundreds of Seattle-based creative professionals and aspiring designers in a variety of settings, including one-on-one tutoring, classroom instruction, live webcasting and large-group training. He currently teaches the Adobe® Creative Suite at The School of Visual Concepts, Luminous Works, Adobe MAX and Seattle Central College and was the founding instructor at CreativeLive. Find him online at JasonHoppe.com.
Getting to Know Jason Hoppe
Colleen Gratzer: Welcome to the podcast, Jason! I’m so excited to talk to you today.
Jason Hoppe: Well, thank you so much for inviting me on, Colleen. This is always great. I always love to be on these and share with people such fantastic stuff.
Colleen: Great and who better to talk InDesign with than you?
Jason: Well, I definitely have used it several times. So I think I can show you a couple things, my favorites.
Colleen: Yeah, I love your courses. I love your sense of humor in your courses, and I don’t know how much you remember of all the funny things that you say in the courses, but every time I go to set tabs in InDesign, I think of when you referred to it as “sprinkling a little bit of salt and pepper.”
Jason: Well, they actually have a whole list of “Jason-isms” that I’ve come up with and, no, I don’t remember them because I don’t plan any of this stuff. It simply just comes out and I make up things on the fly for nicknames and I’ve found that the nicknames of these things actually get people to remember them.
Colleen: Right! Like the cheese grater!
Jason: Yes, That is one of my absolute favorites. Yeah. Absolutely.
Colleen: Well, you and I go way back to the days of QuarkXPress, long before InDesign, so we’ve been using page layout software for many, many years.
Jason: Yes.
Colleen: Yeah, and, as you know, when you know the page layout software well, you can create an efficient workflow that really saves a lot of time, especially with large publications. I’ve seen a lot of designers, as I’m sure you have—even if they’ve used the software for years—they don’t necessarily use the software to their advantage a lot of times and it’s either, I guess, they don’t know how to or they think it’s too time consuming to do the proper setup.
I’ve seen a lot of files from designers without the properly threaded text frames, blank master pages, the same style applied to multiple chunks of text using one frame for text and then another one for the background behind the text, and of course, my favorite is the double paragraph marks.
Jason: Oh, yes, that and double spacing after any punctuation.
Setting InDesign Preferences
Colleen: Oh, yeah. That too. So I thought we would start by talking about things that we do to set up our defaults for InDesign and for our default documents.
So do you want to start with some of the preferences that you recommend be changed in InDesign when someone’s starting to make a more efficient workflow?
New Document
Jason: Absolutely, and the very first thing is when you start up InDesign, the current version of InDesign that people have, which is the most current Creative Cloud, there’s a couple things that are my personal pet peeves.
But when you start up the document, a new document, you get the the big startup screen that gives you all of the different documents, all the different presets that you have, and I like to go into File > New and get my old original document setup without having to go through all these extra steps.
Colleen: Yes.
Jason: That’s actually a preference that you can do under Preferences under General, and that’s the very first checkbox in there and, with that, if you go in and you set that you can actually turn off the “Start workspace when no documents are open,” and so when you create a new document, it will go ahead and forgo that and you can also in the general preferences there, use the “Legacy new document” dialog box and get right back to “I want to create a new document.” Here it is without clicking through several different interfaces.
Colleen: Yep. I do the same.
Jason: Which is totally helpful. So once you set up a new document, being able to go in and create a new document, creating a document preset… when you go in and you set up a new document, at the very top of the New Document window—and I’m talking the older version here of the New Document window. It’s the very simple version. Every time you go in and you set up a document with the width the height, the columns, the margins… If you find yourself doing the same thing time after time—setting up the same file—save it as a document preset. There is a way that you can go in, set up everything and then you can see where you can save this as a preset. So every time you create a new document, you simply have to select that preset and not have to go through the entire process every single time… which is very handy.
Colleen: Right.
Jason: I like that a lot. I see this quite often: people doing the same thing over and over again.
Typographer’s Quotes
Colleen: Right. Now in terms of actual preferences in InDesign, some of the stuff that like drives me nuts is when, if you go to Preferences and then go to the Type preferences when the “Use Typographers Quotes” isn’t checked or “Apply Leading to Entire Paragraphs.” That drives me nuts.
Default Hyphenation and Typeface
Jason: Yes. Well, and on top of that: the hyphenation that’s always turned on so everything hyphenates, which is to me an absolute no-no. Very few people find it acceptable to hyphenate when you get into the graphic design world, and that’s something I like to set and also going in and setting the default typeface.
I remember when Times New Roman was the original typeface and people are like, “I hate Times New Roman.” It’s like you can change and it’s like, “Well, I do every time I start up a document.”
Well, you want to change your preferences. Start up InDesign but don’t have any documents open and then if you go and simply click on the Type tool in your toolbar and you go in and you set your preferences here, you can actually go in and you can set a new typeface—just simply choose a new typeface—in your Type dropdown menu and that is going to go ahead and allow you to set that as your default preference right there, which is super helpful.
Also, turning off the hyphenate before you even begin. Again, just start up InDesign, no document open, click on your Type tool, go to your control bar, click on your paragraph formatting controls and then run right over to the control bar to where the hyphenate is and uncheck it. Now every time you create a new document, those are the new defaults, so you don’t have to keep setting them every single time.
Default Colors
Jason: The same is true with colors if you want different colors in your color palette and you find yourself having to create them every time, start up InDesign, no document open, set your colors, import your colors, do whatever you want, and those will always be in your color panel when you start up a new document.
Default Text Styles
Colleen: Right, and when it comes to the default styles, I go so far as to set up… I change my settings for the Basic Paragraph style. But I also have a bulleted list style in there by default and then a numbered list style that’s based on the bulleted list style. Then I have three different headings, and I have heading level 3 based on heading level 2 and heading level 2 based on heading level 1.
Jason: Yes.
Colleen: And for character styles, I’ve always got in there the superscript, the subscript, bold, italics, bold italics, the hyperlink style, and then what I call “no break,” which I use to prevent words from breaking across lines. That’s better to use than, say, a soft return.
Jason: Correct.
Colleen: Especially for when the text reflows and that’s also against accessibility standards to use that soft return. So I like to have all of those styles all set and ready to go. And all I have to do is format them based on the job.
Jason: Absolutely. And again, you just start up InDesign, have no document open, go under your paragraph or character styles and begin creating them or import them from another existing file. So you can bring them in very easily by going into the paragraph or character styles tab, clicking on the cheese grater. And for those of you who don’t know what the cheese grater is, every panel has a dropdown menu on the right hand side. That’s what I refer to as the “cheese grater.”
In this case, you can go to your paragraph or character styles, click on the cheese grater, load your styles and you have them all in there.
And, as you were saying, Colleen, you’re right, you can set up very nice overall templates and then simply tailor it to the job, where you’re going to change the font or a little bit of leading, kerning, tracking and so on, but it’s always there for you to use.
It’s super easy to go ahead and build. Once you start to use it, you get in that habit and it’s a great habit to get into and then you’ll look at everybody else kind of weird and they’re like, “Oh, I do that every time,” and you’re like “Whaaaat?” No.
Also defining everything in your document with a style—even the page numbers—because if you ever have to change something it sure is easy to change the style and then change it every single place that it was applied, which is wonderful.
Colleen: Right. Well, I also have a paragraph style too I forgot about that is actually for FPO text, which stands for “for placement only,” like any outstanding text that I’m waiting on the client to send, and I also use that style for anything I might need to ask the client about.
So that text is white and I have an object style that’s hot pink, 100% magenta. Then I just create a box and use that object style, which is automatically set to use that paragraph style.
Jason: Wonderful.
Colleen: I also have as a default color too that is 100% magenta that I call “FPO/queries” for that exact purpose as well. That also comes in handy because there’s always something you’ve got to ask a client about in the middle of a job, so that’s make sure I see it because it’s hot pink and then if I send a proof, they’ll see it too because they can’t miss it. And I can easily search for it later too, to make sure I’ve addressed everything.
Jason: Absolutely! Because you can get deep into a project and very easily forget about a header or a caption or something that you don’t have.
One other cool trick that I also want to mention too when you put in FPO text is—and I don’t know if people know this—but if you put in FPO text, the client may ask you, like, “Well, how much room do we have to send to the writer?” or whatever you want to have in here? And it’s like,“Well, how many words can I have?”
Word Count
Jason: You don’t want to go through and count them. One of the cool things that you can do is simply take your Type tool, select all the content in the container, call up your Info panel under the Window menu. This will tell you how many characters, words, lines you have in that container and then you can just send that to the client say, “Hey, here it is. We’ve got 125 words,” and they’re like “Great, I’ll send this onto the writer.” So it’s a really nice thing to know.
Colleen: Yeah, I love that. That’s an awesome feature.
Jason: It is.
Colleen: With the color palette too, I take out most of the colors. So I usually just have paper, black, registration and then my FPO color and then I add colors only as I need them. So, yeah, those are my only default colors.
Jason: Yeah, and a clean file is very, very, very handy to have. Yeah. Doesn’t hurt.
Colleen: Now some other things with paragraph and character styles—you’ve referred to them as the “building blocks” in one of your courses.
Jason: Absolutely.
Based On Styles
Colleen: Can you go into a little bit of the Based On and Next styles and Reset to Base because I think those make things so much easier in the workflow?
Jason: Oh, absolutely, and I use the Based On style quite frequently. And what I do is, if I’m creating a document and I flow in body copy, and I’ve created a paragraph style called Body Copy and it flows throughout my entire document and I want to do a sidebar. In the sidebar I want to use the Body Copy as well. But I want to reverse out the body copy so that it is going to be white type on a darker background.
Well, I don’t want to go in and create a totally separate style that’s called Body Copy Reverse. What I’ll do is I will reverse the copy out in my sidebar and I’ll go over to my Paragraph Styles and create a new paragraph style. When I do that, I’m not going to base it on no other paragraph style. I’m going to base it on my Body Copy style and then change only the attributes that I need to.
The reason why I like to do that is because if the client comes back and wants to change any of the body copy attributes, I don’t have to remember, “OK, I need to change my body copy sidebar too because the body copy sidebar is based on the body copy and, as Adobe calls it, the parent/daughter relationship. What the parent does also translates to the daughter.
So I love using that feature and I only do it when I have text that’s nearly identical but I may change one attribute of it, and most of the time that’s the color. So Based On is great.
Other than that, if I’m doing a header and I don’t need anything else, I’ll just do the header by itself. I won’t base anything else off the header unless I have something that’s exactly the same and maybe it’s a different color or I have headers that have underlines and some that don’t. Then one would be based on the other.
Colleen: I use that a lot for when I’m doing work that has to be accessible to people with disabilities. You can’t use certain characters, like, you can’t use a page break character, for example. So if I had, let’s say, a second-level heading and I need to start a second-level heading on the next page.
Well, I can’t insert a page break. So I create another style based on my existing second-level heading and then I just go into the style Keep options and change Start Paragraph to the next page.
Jason: Right, and so you get much more control and you just have the right button you press without having to manually do anything in your document. Yeah.
Next Styles
Jason: Well, one of the other things that’s in there too is the Next Style. So when you create a new paragraph style, it can be based on another one, but then there’s the Next Style and I don’t know anybody that has actually used this because they don’t know what it is, and the Next Style is pretty awesome.
For those people who like to have their styles created before they start putting the copy in. Some people write their own copy. What’s cool with the Next Style is that when you create a new paragraph style, you can go in and say, “OK, the next style after this is going to be this style.”
For instance, I have a style called Header. So I can draw my text container, start typing and apply the header to it. In my paragraph style, I can say when I hit Return, the next style that’s going to come up is going to be my subhead and then when I hit Return I begin to type, it automatically starts typing in my subhead format.
Then, of course, my Subhead paragraph style can be set in the Paragraph Styles dialog box to have the next style after the Header be the Body Copy. So it’s great because you can type right along and not have to stop and highlight your copy to apply the paragraph styles to it.
You simply build a structure where you have your header and the next style is going to be your subhead, and the next one from the subhead is going to be your body copy. In the body copy, you can have it be the same style every time you hit Return in body copy.
I love that feature.
Colleen: Yeah.
Jason: Not widely used.
Colleen: Right.
Jason: But it’s very handy when typing in manually.
Redefine Styles
Colleen: Yeah, I love it too. Now, when you’re formatting text, you can format text by creating the new paragraph style, like we already went over, or you can select the text and then do Redefine Style, which is cool too.
Jason: Yes. One thing I find for people who are starting to learn paragraph styles get frustrated because they will import a Word document or copy and paste the document into a text container. They’ll select the text. They’ll go over to their paragraph style. They’ll click on the name of the style they want to apply and a plus appears next to it. It doesn’t really work the way it’s supposed to. It seems like it picks up some of the attributes but not all of the attributes of the style.
Colleen: Right.
Jason: Then they get frustrated.
Well, if you right-click on the name of that paragraph style, you’ll get a list of items that you can go ahead and do with that particular paragraph style. One of them is Apply the Paragraph Style and then the second one down there is apply the paragraph style but clear any overrides or anything that is kind of catching it up and not allowing you to apply the full style to it.
This is extremely important when you bring in a Word document when you have links or URLs because, in some cases, the URLs or the links will not get formatted the way you want to. That’s very frustrating to people because it’s like “I keep clicking on it. I can’t do it.” Yeah, because you want to apply it and you want to clear any of the hurdles or any of the overrides that are in it. That’s as simple as clicking the name of the paragraph style, right-clicking on that name and then choosing from the list, which is great.
Paragraph Rules, Borders and Shading
Colleen: I also see a lot of designers not using paragraph rules, paragraph border and paragraph shading, and those are really awesome features. I see instead what they do is they place rules across the page. But they could use these features instead of having to do that. Then they’re part of the text. They move with the text and they don’t have to keep moving those rules. They don’t even have to insert them in the first place.
Jason: Absolutely, because if you are drawing rules under your paragraph headers manually, it just begs to have the text reflow and then you have to mess with all the rules. As I tell people, it’s like, why would you do that? It’s kind of like walking and having your pants not go with you. Of course, you want them to stay with it. Why wouldn’t you go ahead and put the rule in there?
For many years of using this, all you had was the paragraph rule that you could put above or below. Well, now that they’ve gone in and they’ve added the shading and those features, it is wonderful because it’s a whole lot easier to use, and I’ve pretty much gotten away from using paragraph rules, but the borders and shading are pretty awesome as well.
It takes a little bit of time to get used to it. But once you understand how it works it always applies when you hit your paragraph return—because some people can’t figure out when it applies. It’s a paragraph formatting item. When you hit Return, it applies your options, but those are great. Yep.
Keep Options
Colleen: And I think Keep options sometimes get overlooked as well.
Jason: Yes, and Keep options are, as I call them, the “dangling participles.” If you’ve got copy in your document and you have a single line of a paragraph starting at the bottom of the page or—even worse—the last word of a paragraph starting at the top of another page or column in your document, that’s not great.
You want to have the reader follow through in a much more cohesive way. So I don’t want these little crumbs to break where they’re not supposed to. So the Keep options in the paragraph styles allow you to tell it how the paragraphs stay together. If you want to have it start with at least two lines or three lines or end with at least two or three, no matter where the copy flows, it has to abide by those rules.
So you’re never going to get a single line or a word falling in a weird place. If there’s no room for it, it’ll break it to the next available space, column, page, and it keeps it all together. Set it up as a style so you never have to worry about that. Absolutely.
Colleen: Yeah, for my body text, for the Basic Paragraph style, I usually have Keep Lines Together checked and set the “at start/end of paragraph” as 2 and 2, and then with my headings, I always have Keep Lines Together checked and then have them keep with the next three or four lines.
Jason: Yes. Yeah, so you never split a header or have a header at the bottom of the page with no subsequent text afterwards.
Colleen: Right, and it makes it so much easier because then you don’t have to go searching through your document before you send the proof to the client wondering, like, “Oh, did I have any headers that might be at the bottom of a page somewhere that I need to move to the next page?” But then you have to go and insert a page break.
So just create the style. It’s automatically done. It’s great.
Jason: The classic example of “Oh, I only made one change. It didn’t affect anything in the document.” It’s like, yes, it can. Then if everything is a delicate balance of everything being done manually, and you change one thing and you’re on a deadline… No way. Set all these rules to begin with so it’s tried and true every single time.
Colleen: Totally. Yeah, it’s always the last minute when the clients make those kind of changes and then, yeah, it’s like a bomb went off, right?, without the proper setup.
Jason: Yes. Not the time.
Nested Styles
Colleen: Right! So nested styles too I love. There’s so much you can do with those.
Jason: OK, nested styles are delicious. It’s like the filling inside the chocolate when you pick it up, don’t have the label and you get in there, and you’re like, “Oh, this one was good!” That’s what nested styles are for me.
For people who don’t know what nested styles are, nested styles are character styles that are nested within a paragraph style. An example that I use is you’re listing out a bulleted or numbered list or you have a Q&A session where you have the question, you have the answer. You have all your paragraphs formatted and you want the Q and the colon or the dash after the Q to be bold and red. But you want the rest of your paragraph to be whatever setup you have had: size, font, color.
Well, going in and selecting the Q and the colon and making it bold and red and then doing the A and the colon and doing that on every paragraph is fine if you have two paragraphs, but when you have 60, it doesn’t make sense.
So you create a character style to just select the A and the colon. Then you nest that inside your paragraph style and you say, “I would like to do my nested style and I want my bold, red character style to go ahead and go through the first occurrence of my colon.”
The one thing, if people do know nested styles, if you go into your paragraph styles and to Drop Caps and Nested Styles and you create this, there’s a field in there that’s really tricky because you apply the style, it’s “through” or “up to,” meaning through, say, the colon, or up to but not including the colon, and then the number of stops that you have, like the first stop when it occurs.
Then you have a dropdown list and it’s like, “I don’t see colon or semicolon or all that other stuff.” It’s a dropdown menu that you can actually put content in. It’s an editable dropdown menu, which people are like, “Whaaaat?”
Yeah, so nested styles are great. I use them wherever I can.
Colleen: That little dropdown… That’s what I told you about one time in one of the courses.
Jason: That’s the one! Absolutely. So, you’re listening, folks. This is what Colleen taught me, OK? And I will never forget that. I didn’t use nested styles as much because a lot of the stuff that I did were one-page sheets and stuff like that. And now that I get into catalog work, nested styles are it.
So you heard it here, folks. You can never stop learning, and I thank Colleen for that one.
Colleen: So you always think of me when you go set that nested style and put something in that box. I always think of you when setting tabs and your salt and pepper comment.
Jason: There we go.
Colleen: And I also like the nested lines too. Those are pretty cool. But for the most part, I mean, I use the nested styles for a lot, but they come in really handy for tables of contents styles too, like when you’re going to set the leader dots in a different style. Maybe you don’t want them to be so bold or you want to have like just a chunk of text in the beginning of the line to be bold or something. So I find they really help with that too.
Jason: Yes, definitely. Yeah, nested styles wherever they fall in the paragraph. It’s great. Less work you have to do the better.
Tables
Colleen: Yes. Let’s move on to tables a bit. So tables can be tricky. There’re the header and footer rows going on and then the table and cell styles as well.
Jason: Oh, yeah, let me just tell you right now—not my favorite kind of styles. I love tables. I use tables all the time. To me, the biggest frustration with table styles is the fact that something can override something else.
Colleen: Yeah.
Jason: So I can select a row and I can apply a row style so that every other row is going to be shaded and then I can apply a cell style that makes it red inside and it somewhat overrides the row color if it’s tinted, and that’s a bit of frustration. So the reality of it is is I don’t use much in terms of the way table styles are. I’ll use the very basics like the alternating rows or strokes and I actually rely on my paragraph styles more than my table styles.
And it is frustrating. I mean, I know how to use it, but, to me, I’m faster with paragraph styles and I can set it up and a lot of times I’ll just pick up a table that I’ve used before and rejigger it a little bit.
So even the professionals also have their little cheat methods and I’m one of those. I love tables. I don’t dig table styles.
Colleen: Yeah. Well, I’ve had to use them quite a bit. But what I think is really handy is at least if you have a header row it look it can look like a header row. Maybe you apply a subhead paragraph style to it or if you go and select it and then right-click or go to the Table menu and Table Options and then tell InDesign, hey, this is my header row—
Jason: Yes.
Colleen: …if you have created a style for a header row and apply it in that table setting then it will automatically apply it and then if the table goes to more than one page, it’ll repeat it. So I like that.
Jason: Oh, that feature I love, because I do tables that are three pages long and the last thing you want to be doing is cutting and pasting the header as things move.
Colleen: Right.
Jason: No, I want it to occur on the head of every page. Absolutely.
On the subject of tables… I’m so glad when last year they finally put the feature in where you can select a row or a column and then option-click and drag and duplicate it or just select it and move it to a different position.
Colleen: Oh, I don’t think I’ve done that.
Jason: Oh my gosh, I was working on a very large catalog and I had selected a row and I accidentally bumped it and it moved, and I’m like, “Wait a second. Did that just move?” and it’s like, “Yes, it did!”
Then, of course, what do you do? I try every single option combination key command, shift, whatever, to see what else it does and I’m like, “No idea.” It’s just like, no way. It’ll copy the row or the column as long as it’s not like split or merged, but I can now select multiple rows and then just drag them down into a different position in the table without cutting out, pasting in, adding. Yes, drag and drop.
Colleen: I had no idea you could do that.
Jason: What? Oh, my God, you’ve been missing the best part of tables!
Colleen: Now I’m going to want to work with them and I’m gonna go make one just so I can try that out!
Jason: I actually get kind of giddy when the client is like, “Could you move these rows?” and it’s like, “Oh, absolutely.”
Colleen: Yeah. I’ve got to do some heavy lifting to do that.
Jason: I love it! After so many years of not having that feature… Yeah, it’s nice.
Colleen: Cool.
Jason: Yep.
Master Pages
Colleen: Master pages, like you were saying earlier, we can set up master pages as our default, with no documents open. I wanted to talk a little bit about nested master pages and text variables—
Jason: Yes.
Colleen: …and different ways that those can be used because those come in super handy when you’ve got a publication with like 400-some pages and different chapters and sections and things like that.
Jason: Yes, and surprisingly enough, I don’t do a lot of nested master pages. What I do is I usually have three or four different master pages set up and for what it may be—the introduction of a chapter… Then if I’m doing facing pages, I’ve got my spreads.
If I’m doing single pages I’m going to have different pages set up and I have done nested master pages before when, say, you have a logo on a page with a descriptor and you want to use the same layout but you want to add a little bit more content. I don’t want to create two separate master pages. So very much like the Based On concept in paragraph styles, I would create another master page instead of it being blank. I would base it on an existing master page that has my content and then I would add to it or change something on that page, so that if I change the original master page—say the location of the logo or a picture—then it’s going to go ahead and affect all the subsequent pages too.
I don’t use that very often, but I do find people use it unknowingly because they go in they create a new master page and they actually duplicate the existing master page in there by option-click and dragging and then change it, not knowing that they have actually just done a master page based on another master page.
That’s the biggest thing that I see is people using it incorrectly rather than people using it correctly.
Text Variables
Colleen: Well, for long publications, I used to use a ton of nested master pages. But when I started using text variables on the master pages, I realized that I didn’t need to have a master page for every single chapter with a text box with the chapter title in it. I could just have one and then use the text variable. So it picks up the title automatically from the page it’s on. Otherwise, if the text for the chapter title changes, you’ve got to remember to change it in your document and then on the master page.
Jason: Oh, yeah.
Colleen: So I love that with text variables, you don’t even have to do that.
Jason: Well, I just did a 500-page document for a government publication and I hadn’t used text variables very much. But I noticed in their document that wherever a page occurred—wherever like a subheader or header occurred—it would just put it up in the upper lefthand side of the page.
They had done this all manually. So when it reflowed, they’d have to copy the first occurrence of this header and put it up into that text container and it’s like, “No. You create a container on the master page and tell it whatever is the first-occurring header or subhead on the page, just put it into this container.” It’s great. You reflow it and everything changes. They’re like, “Doesn’t that take hours?” It’s like, “Well, it could take hours if I did it manually, but I set it up manually. So it always does that.”
Text variables are very cool. Not something I use very often, but, boy, when you need to use them, they are delicious!
Guides
Colleen: OK, guides… In one of your courses you referred to… You came up with a term called “guide hoarding.”
Jason: Yes.
Colleen: …when you were talking about setting up guides quickly and accurately and I’ll let you describe how you say that people normally do it. But you were also talking about using InDesign as a calculator.
Jason: Oh, my gosh, yes. That is another fantastic feature. And the guide hoarding that I was referring to is people that don’t know how to get rid of guides on their page. They don’t know that you could go in with your Selection tool, click on the guide, it turns dark blue and simply hit the Delete key and get rid of that.
Colleen: Yeah.
Jason: If you want to get rid of them quickly, go up to your ruler, right-click on the ruler and at the very bottom of the dropdown menu is the Delete All Guides on Spread feature. So all the manually done guides will disappear.
But setting up guides, especially if you’re doing a brochure—two-, three-, four-panel brochure—and you want to get equal divisions on the page, people will break out their calculator and they’ll say, “OK, 17 divided by 4 equals…” Don’t know, don’t care.
Just drag the guide onto your page and select that guide. Go up into your control bar. The only thing that shows up in the control bar is the measurement for where that guide is on the page. If you drag from your left ruler and you put your guide on the page and click on it and you have an 11 by 17, so it’s 17 inches wide. You select the guide, you go up into the only thing that’s active in the control bar and you use that as your calculator. You type in “17 / 4,” because that’s what you’re going to do on your calculator and you hit return. It automatically will move your guide over to 4.25 inches, which is awesome.
Colleen: Yeah. I love that.
Jason: Then you want to put your next guide in there, you don’t even have to drag a new one. Select that existing guide. Go up into that field and simply type in “* 2,” which is actually just your asterisk right there, on your number calculator thing. You say “x 2,” but don’t just hit Return. Hold down Option- or Alt-Return, which is going to copy it and it will then move it over to your next position.
Calculators are amazing, but I don’t use them because InDesign fields will go ahead and allow you to calculate anything: add, subtract, multiply, divide, percentages—you name it—for anything: size, rotation, angle, skew, guides position. Yes. Love it!
Colleen: Yeah.
Jason: Absolutely love it!
Colleen: Awesome.
Jason: Yep.
Object Styles
Colleen: OK. Let’s talk about object styles and how cool they are.
Jason: Object styles are so easy to use. I think that’s the first thing. But a lot of people I see when they’re going in and they’re creating containers or text boxes and they keep wanting to apply an attribute to it such as a stroke or a fill or, heaven forbid, a drop shadow. You want to do this every time or even when you have an image container, where you have head shots and you want to have a text wrap around the container. Doing it on every container manually doesn’t make sense.
So you select your container and you do things like go into your Object menu under Fitting and say, “OK, every time I import an image into this container, it’s always going to fit it proportionately, and if I want a text wrap around it, I apply that to the container and if I want to drop shadow, I do that if I want a fill or stroke, I do that.
Then I simply select that object and I go to my Object Styles panel and I capture that as an object style and just like as a paragraph or character style, all those attributes are baked into that object. Every time you need to use it you select your object and you go over there and you click on your object style and it’s like a magic wand and you just whack it and the thing just miraculously has all the styles and all the attributes applied.
If the text wrap or the drop shadow needs to be changed, then all you have to do is edit that object style, and every single place where you need to use it has been edited.
Colleen: Right. Well, when I use object styles for photos, let’s say, and I’ve scaled a photo, I have to remember—because it doesn’t seem to do this automatically—I have to go back and select that photo that I scaled and then go up to the topmost cheese grater in InDesign, up by the little lightning bolt.
Jason: Yes.
Colleen: …and then click Redefine Scaling as 100% because if there’s, let’s say, a stroke of 4 points and I’ve scaled the object up or down, the stroke weight changes unless you actually go in and change the Redefine Scaling as 100%.
Jason: Yes, that is correct. And that cheese grater that she is talking about is at the far end of the control bar, right up there, and you’ve got the little Shazam, which is the lightning bolt right there, and you have your cheese grater.
Every panel has a cheese grater and the control panel has a cheese grater and then you can click on that and you can go ahead and you can redefine the scaling you can also set your stroke styles and set everything back to the settings that you want. So even the control bar has a cheese grater, folks.
Tables of Contents
Colleen: So table of contents I see getting neglected all the time too. I see them done manually and I’m just like, “Oh, that’s so much work,” especially if you have to go back and redo it, and pages are going to change. It’s just so much work to have to do that.
I think that some people don’t know how to do it properly or they do it manually because sometimes you have a table of contents where the titles need to be slightly different—maybe shorter than what’s actually used in the document.
I don’t know but they don’t use the table of contents feature as often as they should from what I’ve seen, so let’s talk a little bit about those styles because that’s also where these nested styles come into play as well.
Jason: Yes, well, table of contents I have seen people do it manually and I just did a 5,000-page manual and doing the table of contents manually is absolutely out of the question.
Colleen: Right.
Jason: I don’t think people realize that table of contents is something that requires virtually no time and no effort because if you’ve set your entire document up with paragraph or character styles, your table of contents is like two clicks away from being completely done for you because your table of contents is based on what paragraph styles you define to go ahead and pull from to make your table of contents.
So if you have your Header paragraph style, all you do is go under the Layout menu and you say, “I want to create a table of contents” and it says, “OK, where do you want to pull your table of contents from?,” and you click on your header style and say, “OK, I want to add that to my list of styles here.”
If you leave it at that and then click OK, you get a loaded cursor. Every single place where that header occurs, it will give you what that header says and then will go ahead and give you the page that it’s on, which is absolutely awesome.
You can get more into this where you have your header and your subhead to get basically an indexed table of contents.
But if you ever export this as a PDF too, one of the things that it does is your table of contents, based on how you’ve set it up, automatically creates bookmarks in your PDF.
Colleen: Love that!
Jason: So you don’t have to do any work beyond that. It’s already there. You hit File > Export the PDF and you want to post it someplace… You have no other work that you have to do. Your table of contents now has a list of bookmarks as well, and it is spectacular.
Then you can format your table of contents once you float it in, create a style for the table of contents for the look and the feel and then if anything changes in the document, you can always go back into the Layout menu and you can simply say, “Hey, I just want to update my table of contents because I’ve shuffled a few pages” and it just simply updates it. Done! No other work.
Yeah, manual table of contents is something that you only do if you’re getting paid by the hour. Even then, I wouldn’t want to.
Colleen: So when you were talking about the PDF, when you export the PDF, not only do you have the bookmarks, but then you have the clickable table of contents. When you do it manually, you can’t go into that PDF and just click on it.
Jason: Correct. No, these are active links. It does it for you. Yeah, and, I mean, it’s like why wouldn’t you?
Colleen: Right.
Jason: Yeah.
Colleen: Well, I was working on a publication recently where I needed to have modified and shortened versions of the chapter titles that appear in the document for the table of contents. So what I did was I copied each of the chapter titles—there weren’t that many—but I copied the chapter titles and put them in a separate text frame and applied a different paragraph style just for them. I put the text frame on the pasteboard and had the edge of it touching the edge of the page.
Jason: Oh, I know where this is going. Oh, yes, yes.
Colleen: …and then I set that style to be used for that level of heading for the table of contents. So having it touch the pasteboard but not be visible on the page was enough to allow InDesign to recognize it to build the table of contents, but it used that version instead of the other style—the longer chapter titles—for the table of contents.
Jason: Oh, yes, yes. Well, if anybody’s familiar with what Colleen just said, we use this in the publishing world specifically for like magazine and newspaper, when we have a story that we basically have to continue on another page, but we don’t know where that page continues on.
So we put a text container touching the existing text container and then we put in the command “continued on” page or “continued from,” so it’s touching but it’s not really included in there.
That kind of led me to that little tangent right there. But I like what you’ve done where it touches the page, but you never see it.
Colleen: Yeah. What you mentioned sounds cool too.
Jason: Yeah, absolutely.
Mapping Text Styles
Colleen: Now, when it comes to importing files, importing your text files—
Jason: Yes.
Colleen: Mapping styles is pretty cool. And there’s some different options that we have there with mapping styles and importing existing styles.
But, of course, the clients never use the paragraph and character styles in Word, so they’re usually just the same style—the basic style—and then the formatting all done locally.
Then, of course, we have the Preserving Styles options there too.
Jason: Well, I’ve only seen one person ever format a Word document extremely well and so bringing in a Word document, when I ever place a Word document, I go under File > Place and then when I get the Place dialog box window, I always click on the Show Import Options, so that I can intervene in the middle of the people’s good intention, as people call it. You know, I’m playing “graphics designer.”
When I do the Show Import Options, I can go ahead and I can just basically strip the file of all their helpful “graphics designer” items and just get the Word document imported.
On a rare occasion, I will use the Keep the Styling because if somebody really knows how to use Word and I can go ahead and keep the styling work—see that they’ve done the bold or italic or the color or such… That’s helpful as well, but it’s not common that we do that.
If somebody really knows how to do it, then I will step up and I will choose the third option, which allows me to have my prearranged styles in InDesign and I can map or basically link up their styles from what Word calls the styles, like Header and Normal and Subhead 1, 2, 3, and I can link those up and say, “OK, if Normal comes in from Word here, I want Normal to be my Body Copy.
In the rare case that it works, it links up those styles and basically formats everything very nicely. That is more if you have a really good editor or you have somebody you know very well and you teach them how to use styles in Word. Then that becomes a huge benefit. It doesn’t work very often, but, boy, when it works and it works well, it is great.
Colleen: Yeah, you can format so many pages so easily. You just have to check them just to make sure that all the styles, that they were used in the right hierarchy.
Jason: Yes, and a word of advice is don’t open a Word document, copy everything from the Word document and then paste it into InDesign.
Place the Word document with your Show Import Options on and we basically say, “Just give me the unformatted text and clean up everything.” It’s going to save you a lot of hassle.
Colleen: I also like—if you check the Show Import Options box, when you go to import an Excel file—that you have an option to import only certain cells or sheets. So that’s pretty neat.
Jason: Well, the sheets is a big thing because if you just import an Excel document, it’s only going to give you the first sheet and people are like, “Well, I’ll need to open up the Excel document, save that sheet out and then save it and then import it.” It’s like, “No. Keep it in there.”
Same with a multiple-page PDF. If you want to import a PDF in there and your client tells you, “I want page 7,” people will take page 7 out, save it as page 7 and then they don’t have it in the original document. No, don’t do that. File > Place > Show Import Options and it’ll say hey, “It’s a PDF.” It’ll give you a preview of every page and you’re like, “I want page 7.” You click Open, you import page 7 without breaking the file apart.
Importing Images
Colleen: Right. When it comes to importing images, you can import vectors or you could paste them in. If I have a vector—the same vector file used in multiple places—I like to place it, as opposed to pasting it, because then if that file changes, I only have to update it in InDesign. I don’t have to go and find them all in the InDesign file and replace them in all those different instances.
But what I like about pasting vectors is that you don’t need the linked file. And then if you work on something later, you can just copy and paste that vector from that InDesign document.
Do you have any thoughts on pasting vs placing when it comes to vectors?
Jason: Well, I’m a stickler for making sure there’s a link to everything. The difference between placing it in there is when you place it you have you have to establish the link to the file and keep track of your files, and that’s fine.
But pasting it in there it literally just copies the vector shapes and pastes them in to the InDesign document as vector shapes. They’re all kind of grouped together, but they are somewhat editable with the Direct Selection tool, the Selection tool.
Colleen: Right.
Jason: I tend to stay away from that simply because if somebody gets the file and they want to edit that file, it’s not as easy to edit it. Plus, what I have also found is if somebody really knows Illustrator and they’ve done certain things like effects or they have gone ahead and they have shifted the border on their container to be on the outside or on the inside and not centered, it will actually mess with a few of the things in Illustrator and you may not end up with the exact same graphic when you scale up or down, than you would by placing the file and being able to scale it.
I have seen that happen where things change. People will go ahead, and if you paste it right in from Illustrator, the same size and never mess with the size, it’s fine. But I’ve seen that if you copy and paste in and it retains its vector, when you scale it, things can begin to skew off a little bit.
So I’m a strong proponent of File > Place, always placing the files, having to deal with the links, but less hassle when it gets to the printer.
Colleen: Great points. Well, I haven’t seen any issues with it skewing but I sometimes go to paste vectors with gradients and the gradient totally changes color when I put it in InDesign. I’m like, “I don’t know what that’s all about,” because in Illustrator it had a color designated to it, and then I paste it into InDesign and it goes from blue to red. I mean, totally different!
Jason: Well, Illustrator is in a total world by itself when it comes to color and color management. So that’s a whole separate topic.
Colleen: So there are some really cool tips that you share in your courses with importing photos and how to your size them on the page.
Jason: Absolutely. So just placing a normal file—File > Place—and then clicking and dragging your cursor to get the size that you want and I always turn off my content grabber, which is that little focus wheel in the middle.
Just a personal pet peeve. I can’t stand that thing.
Colleen: I hate it too.
Jason: Yeah, because where do you grab the picture when you move it? Always from the middle. It’s like no, again, why would you want to go ahead and have your picture move but your frame not move?
Colleen: Right!
Jason: Almost never. But I like when you bring in multiple images instead of one at a time or just go under File > Place, select multiple images at once, you get the loaded cursor that shows you how many are in there. You can walk through them by using your arrow keys on your keyboard to see what’s in there. And if you’ve inadvertently selected one you don’t want, you can just hit the Escape key once and it just knocks it out of the running.
Then I want to place all of them very much like a contact sheet. I just draw one large container and then with my mouse still held down, I’ll use my up arrow and my right arrow to create rows and columns—enough to satisfy the number of images I have in my loaded cursor. Then when I let go of the mouse, I get equal-sized containers and all the images are placed in there instantly and it’s wonderful. I love it!
Colleen: It’s not delicious?
Jason: No. There’re certain things that are delicious. Nested style are delicious. That’s just really cool. That’s when you get a coupon for like 50% off a meal. No, delicious is a nested style. That’s like fun ooey, gooey center in there and you’re like, “This is delicious!”
Colleen: Well, speaking of images—and also with objects too and even text frames—I think sometimes the Align panel gets overlooked. When I pick up other designers’ files, I often see that the measurements aren’t correct. They’re not totally lined up perfectly. I’m OCD about that.
Jason: I know. Close enough doesn’t cut it.
Colleen: Right.
Jason: Well, in most cases, I mean, if you do pay attention to your smart objects and your smart guides on how you line things up using your smart guides, that’s really good. But, yes, when you want to go in and just double check to make sure everything is aligned, just select everything and align it left, top, center, right. That’s also very very beneficial.
Some people I find turn off the Snap to Guides, which I think is a bad idea because if you do set up guides in your document, which you should, everything should snap to it. So if you have a text container or a picture, set all your guides up on a master page. Snap to it.
I find that I don’t use much alignment unless I’m creating a lot of little fussy stuff on the page and I’m not going to spend the time to really use my smart guides all the time. I’ll just select them all and say, “OK, make everything flush left,” and then I’ll use my Align and Distribute to make sure that the spacing is the same in between.
But smart guides while you’re building, if you haven’t set up guides to begin with, use the smart guides. Set your Snap to Guides to be on, so that you can just build it in a more efficient way rather than having to go back and fix the things that you shouldn’t have messed up in the first place.
Colleen: Right. Wow. We’ve covered a lot here. This is really great.
Jason: Absolutely, and we can do this again to whenever you want to.
Colleen: I would love to. I was just going to say we could sit here and talk about so many more things.
So thanks for coming on the podcast, Jason. This has been really fun.
Jason: Oh, it’s been great, Colleen. Thanks so much for asking me to do this. And the one thing I can do is talk.
Colleen: Me too! So you have a lot of great courses that I’m sure the listeners would be interested in. So why don’t you talk a little bit about those and where they can be found.
Jason: Well, if anybody knows CreativeLive, I probably have about 40 classes up there on Photoshop, InDesign, Illustrator, Acrobat, design, layout, interactive PDFs, building infographics, beginning, intermediate and advanced courses on all things InDesign, Photoshop, Illustrator and Acrobat.
If you’re in the Seattle area, I also teach classes at The School of Visual Concepts and Luminous Works as well.
But you can definitely find all my videos online, including pumpkin carving because Halloween’s coming up. Yes, I do pumpkin carving classes. There are a couple videos there.
Colleen: Awesome!
Jason: Plus, I also have an Illustrator blog that I do every Monday for those people who want to learn how to use Illustrator but don’t want complicated concepts but want really cool-looking logos and illustrations. That is at my website, JasonHoppe.com/blog. You can check that out too and sign up for that as well if you like Illustrator as much as I do.
Colleen: Cool. Yeah, your CreativeLive courses are great and your blog is great too. I’ve taken a few of your CreativeLive courses.
Jason: Wonderful. Well, and people are like, “You should do an InDesign blog,” and it’s like OK. There’s a lot of things that I should probably write a book about. Time…
Colleen: Right.
Jason: Yep!